

There's a moment, about two hours into a pot roast's slow braise, when the kitchen fills with a warmth that feels almost deliberate — rich, meaty, faintly sweet from the caramelized onions, earthy from the root vegetables. Late March is exactly the right time for this kind of cooking: the evenings still carry a chill, spring hasn't fully committed, and a heavy Dutch oven on a low flame is still the most honest answer to a gray afternoon. Most home cooks have their pot roast locked in. The cut, the liquid, the aromatics — all familiar, all reliable. And yet, one single sprig of fresh rosemary, added at the right moment, can shift the entire register of the dish.
This isn't about drowning the beef in herbs. One sprig is the precise word here — not a handful, not a bunch, just one firm, fragrant stem of rosemary tucked into the braising liquid about halfway through cooking. What follows is a quiet transformation: the piney, camphor-laced oils release slowly into the braise, binding with the rendered fat, the wine, the collagen from the meat, and building a depth that no amount of extra browning or seasoning can replicate. This guide breaks down exactly why it works, how to do it without overpowering the dish, and what to watch for when timing is everything.
| Preparation | 20 min |
| Cook time | 3 hrs 30 min |
| Portions | 6 people |
| Difficulty | Medium |
| Cost | $$ |
| Season | Chuck roast, carrots, celery root, fresh rosemary |
Ingredients
For the roast
- 3.5 lbs boneless chuck roast, tied if needed
- 2 tbsp neutral oil (grapeseed or vegetable)
- 1 tbsp kosher salt
- 1 tsp freshly ground black pepper
- 2 tbsp tomato paste
- 1 cup dry red wine (Côtes du Rhône or Cabernet Sauvignon)
- 2 cups beef stock, low-sodium
- 1 cup water
For the aromatics
- 2 yellow onions, halved and thinly sliced
- 4 garlic cloves, smashed
- 3 carrots, cut into 2-inch pieces
- 2 stalks celery, cut into 2-inch pieces
- 1 small celery root, peeled and diced (about 1.5 cups)
- 2 bay leaves
- 1 sprig fresh rosemary — the star of this recipe
- 4 sprigs fresh thyme
Utensils
- Large Dutch oven (at least 6 qt)
- Tongs
- Wooden spoon or silicone spatula
- Sharp chef's knife
- Cutting board
- Ladle
- Fine mesh strainer (optional, for finishing the sauce)
- Meat thermometer
Preparation
1. Season and temper the meat
At least 45 minutes before cooking — ideally the evening before — remove the chuck roast from the refrigerator and pat it completely dry with paper towels. Moisture on the surface is the enemy of a proper sear: any water will steam the meat rather than brown it, and you lose the Maillard reaction, the chemical process between amino acids and sugars that produces the hundreds of flavor compounds responsible for that deep, roasted crust. Season generously on all sides with kosher salt and black pepper, pressing the seasoning in with your palm. Let the meat rest at room temperature for at least 30 minutes before it hits the pan — a cold center prolongs cooking time unevenly.
2. Sear until deeply browned
Set your Dutch oven over medium-high heat and add the oil. Wait until the oil just begins to shimmer and send up the faintest thread of smoke — this tells you the pan is hot enough to sear rather than stew. Place the roast in the pot without moving it. You should hear an immediate, assertive sizzle. Resist the urge to press down or shift the meat. After 4 to 5 minutes, the roast should release naturally from the surface when a proper crust has formed. Sear all sides, including the narrow edges, turning with tongs. The final color should be mahogany, not pale brown. Transfer the meat to a plate and set aside.
3. Build the aromatic base
Reduce the heat to medium. In the fat left behind in the pot — scraping up any browned bits with your wooden spoon — add the sliced onions. Cook, stirring occasionally, for 8 to 10 minutes, until the onions are soft and beginning to take on a golden edge. They should smell sweet and slightly nutty. Add the smashed garlic and cook for another 2 minutes, stirring frequently so it doesn't catch. Push the onions and garlic to the sides of the pot and add the tomato paste directly to the center of the pan. Toast the paste for 2 minutes, stirring and letting it darken to a rusty, brick-red color — this step eliminates raw, acidic notes and adds a quiet, savory undertone to the braise.
4. Deglaze and build the braising liquid
Pour in the red wine and use your wooden spoon to deglaze — scraping every last bit of fond (the caramelized residue on the bottom of the pot) up into the liquid. These dark, concentrated bits are pure flavor. Let the wine reduce by half over medium-high heat, about 3 to 4 minutes. Add the beef stock and water, then stir to combine. Add the carrots, celery, celery root, bay leaves, and thyme sprigs. Nestle the seared roast back into the pot — the liquid should come about halfway up the sides of the meat, not submerge it entirely. Bring to a gentle simmer.
5. The low braise — and when to add the rosemary
Cover the Dutch oven with its lid and transfer to an oven preheated to 325°F (165°C). Cook for 1 hour and 45 minutes. Then — and this is the step most recipes miss — remove the lid, add the single sprig of fresh rosemary directly to the braising liquid, replace the lid, and continue cooking for another 1 hour to 1 hour 15 minutes. Adding the rosemary too early causes the volatile oils, particularly borneol and camphor, to cook off entirely, leaving behind only bitterness. Added in the final stretch of the braise, rosemary's oils have just enough time to infuse the liquid without dominating it. The meat is done when it yields easily to a fork and pulls apart in clean, fibrous strands — an internal temperature around 200 to 205°F (93 to 96°C) signals full collagen breakdown into gelatin.
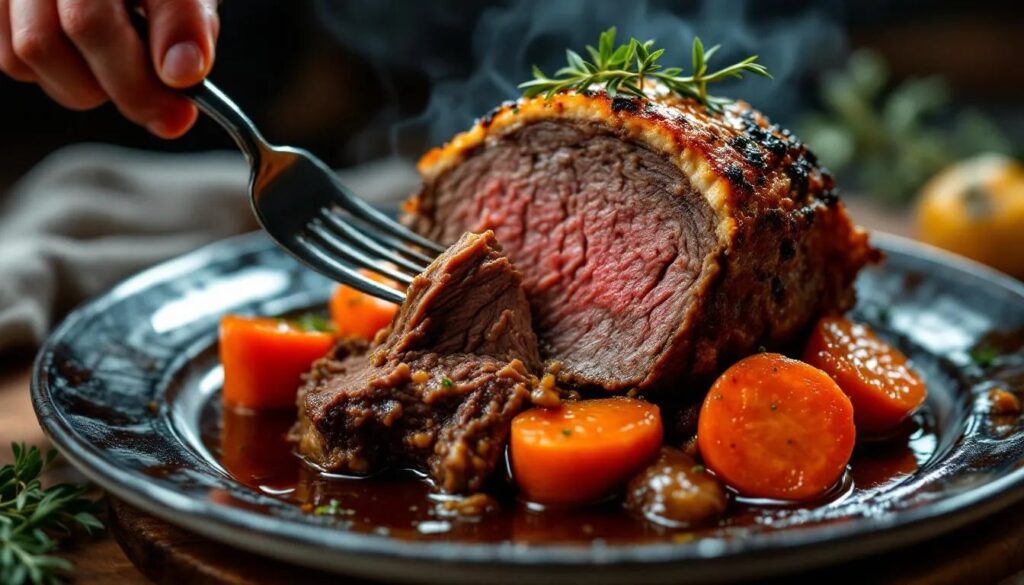
6. Rest, reduce, and serve
Transfer the meat to a cutting board and tent loosely with foil. Let it rest for at least 15 minutes. Meanwhile, skim any visible fat from the surface of the braising liquid with a ladle. Remove the rosemary sprig, bay leaves, and thyme stems. If you want a more concentrated sauce, bring the braising liquid to a boil over medium-high heat on the stovetop and reduce for 10 to 15 minutes until it coats the back of a spoon. Taste and adjust salt. Slice or pull the beef and return it to the pot, or serve alongside with the vegetables and sauce spooned generously over the top.
My chef's tip
The cut matters more than almost anything else here. Chuck roast — specifically from the shoulder — is shot through with fat and connective tissue that renders down over low, slow heat into something silky and unctuous. Avoid lean cuts like eye of round: they turn dry and stringy at these temperatures. As spring produce arrives, consider swapping the celery root for young turnips or the first new potatoes of the season — both absorb the braising liquid beautifully and come into their own in late March. And if you have access to a farmers' market, a bundle of young carrots with the tops still on, added in the last 30 minutes, makes the finished dish look like it was thought about.
Wine pairing
A braise built on red wine and beef pairs best with a wine that complements it, rather than competes. Look for something with enough body to balance the fat and gelatin, and enough acidity to cut through the richness.
A Côtes du Rhône or a southern Rhône blend of Grenache and Syrah is a natural match, offering warm fruit, a peppery finish, and medium tannins. A Malbec from Mendoza is another accessible option, with plum and tobacco notes that complement the dark, roasted character of the braising. For a non-alcoholic option, try a rich, unsweetened grape juice reduced by a third with a pinch of black pepper and a splash of red wine vinegar for a surprisingly complex alternative.
About this dish
The concept of pot roast predates American home cooking by several centuries. The technique of slow-braising a tough, inexpensive cut in liquid is found across French pot-au-feu, Italian stracotto, and the German Sauerbraten. In the United States, it became a Sunday fixture throughout the 19th and early 20th centuries, when wood-burning stoves made long, unattended cooking practical, and chuck was among the most affordable cuts available. The dish represented abundance, leisure, and a meal meant to be savored.
Rosemary's affinity with roasted and braised meats has a long history. Mediterranean cooks paired it with lamb and pork long before it was used in beef preparations. Here, it's not just for aroma or decoration; it plays a structural role, binding the fat-soluble aromatic compounds into the braising liquid. This gives the finished sauce a complexity that no single spice or seasoning can achieve on its own. Modern versions of the dish sometimes include anchovy paste, miso, or a Parmesan rind for additional umami — techniques worth exploring, though none replace the subtle impact of a single, well-timed sprig.
Nutrition facts (per serving, approximate values)
| Nutrient | Amount |
|---|---|
| Calories | ~520 kcal |
| Protein | ~48 g |
| Carbohydrates | ~18 g |
| Of which sugars | ~6 g |
| Fat | ~27 g |
| Fiber | ~3 g |
Frequently asked questions
Can this pot roast be made ahead of time?
Yes — and it's actually better the next day. Braised beef benefits significantly from resting overnight in its cooking liquid: the meat reabsorbs the juices as it cools, and the flavors continue to develop. Reheat gently, covered, in a 300°F (150°C) oven for 30 to 40 minutes, or over low heat on the stovetop. Avoid boiling, which tightens the muscle fibers and makes the meat tougher.
How should leftovers be stored?
Store the beef submerged in the braising liquid in an airtight container in the refrigerator for up to 4 days. The fat will solidify on the surface overnight — lift it off with a spoon before reheating, or stir it back into the sauce if you want a richer texture. Leftover pot roast also freezes well for up to 3 months; freeze in portions with liquid to prevent freezer burn.
What can I substitute if I don't have fresh rosemary?
Dried rosemary works in a reduced quantity — use about ¼ teaspoon, crumbled, and add it at the same halfway point in the braise. Be cautious: dried rosemary can turn resinous and sharp if overcooked. Fresh thyme alone won't replicate the effect, but a combination of thyme, a small sage leaf, and a strip of lemon zest gets surprisingly close to rosemary's aromatic range.
Why does my pot roast sometimes turn out dry?
The most common reason is a cooking temperature that's too high or a cook time that's too short — both prevent the collagen from fully breaking down. Chuck roast needs to reach an internal temperature of 200°F or above to fully convert into gelatin. At 165°F, the proteins have contracted but the connective tissue hasn't softened, resulting in a texture that feels dry despite being cooked in liquid. Keeping it low and slow, at 325°F for the entire time, is essential.
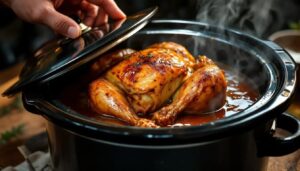
Can I make this in a slow cooker instead of the oven?
Yes, with one adjustment: always sear the meat and build the aromatic base on the stovetop first. If you skip this step, the braise will be pale and lack flavor, regardless of how long it cooks. Transfer everything to the slow cooker, add the rosemary sprig after the first 4 hours on low, and continue on low for another 2 to 3 hours, until the meat pulls apart easily. The sauce will be thinner than the oven version — reduce it separately on the stovetop if needed.